

How to Seal Entry Points Around Piping: Effective Methods for Home Protection
- - Why Sealing Entry Points is Important
- - Common Types of Entry Points Around Piping
- - Materials You Need for Sealing
- - Step-by-Step Guide to Seal Entry Points
- - Tips for Long-Term Success
- - Why Choose PestControlHub for Your Sealing Needs
1. Why Sealing Entry Points is Important
Sealing entry points around piping is a crucial step in maintaining your home’s integrity. These gaps and cracks, often overlooked, can allow various issues to creep in. From pests and rodents to drafts and water damage, the effects of leaving these gaps unsealed can be costly. Properly sealing entry points helps to keep your living space secure, comfortable, and energy-efficient.

2. Common Types of Entry Points Around Piping
There are several common entry points around piping that need to be sealed. Understanding where these gaps typically occur is the first step in preventing problems.
2.1. Plumbing Penetrations
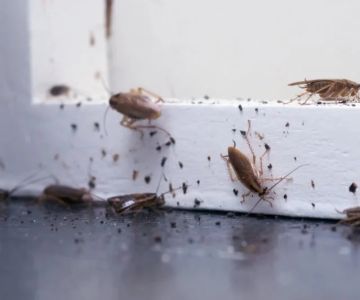
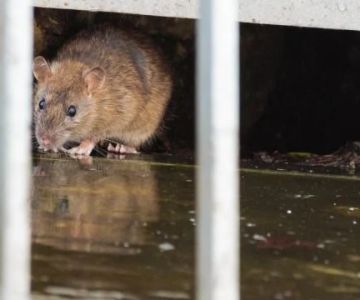
Plumbing pipes entering your home from outside or within the walls often create small gaps where air, pests, and even water can seep through. These are common entry points for insects like ants, roaches, and even mice looking for food or shelter.
2.2. Ventilation and HVAC Ducts
HVAC systems and exhaust pipes can also be sources of unsealed gaps. Poorly sealed ventilation areas allow not only pests to enter but also the outdoor elements like cold air or humidity, which can affect the home’s internal temperature.
2.3. Electrical Wiring Holes
Electrical wires running through walls or floors can leave gaps around them. While these holes are necessary for the wires to pass through, they can easily become conduits for pests if not properly sealed.
3. Materials You Need for Sealing
Choosing the right materials is essential for a long-lasting seal around your piping. The following materials are best suited for sealing entry points:
3.1. Caulk
For smaller gaps and cracks, a high-quality caulk (silicone or latex-based) is perfect for creating a waterproof, airtight seal. Caulk is easy to apply and is highly effective at sealing areas around pipes where precision is needed.
3.2. Expanding Foam
Expanding foam is ideal for larger gaps and holes. It expands to fill the cavity, providing insulation and sealing off any potential entry points. It is perfect for use around plumbing pipes or ventilation ducts.
3.3. Foam Backer Rods
For larger openings that require a stronger seal, a foam backer rod can be used to fill up the space before applying caulk or foam. This prevents the material from sinking into the gap and helps to provide a solid barrier.
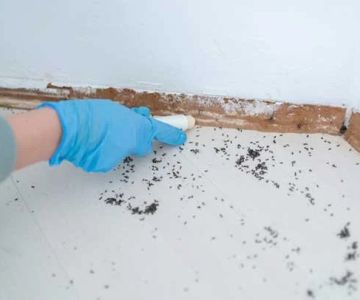
3.4. Steel Wool
For areas where rodents are likely to enter, steel wool is a great option. It is difficult for pests to chew through, and it can be stuffed into cracks and around pipes before sealing with caulk or foam.
4. Step-by-Step Guide to Seal Entry Points
Sealing entry points around piping is a straightforward task, but it requires attention to detail. Here’s a step-by-step guide to ensure effective sealing:
4.1. Inspect the Areas Around Pipes
The first step is to inspect your home thoroughly for any visible gaps or cracks around pipes, vents, or electrical wires. Pay close attention to areas where pipes enter through walls, floors, and ceilings. You may also want to check the attic or crawl space.
4.2. Clean the Area
Before sealing, clean the area around the gaps to remove dirt, dust, or grease. This ensures that the sealant adheres well and creates a long-lasting barrier.
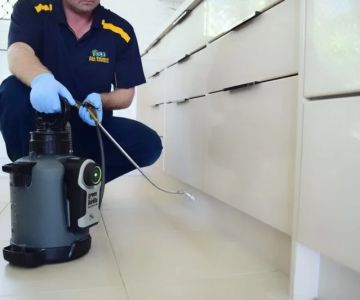
4.3. Apply the Sealant
For small cracks, apply caulk directly into the gap using a caulk gun. For larger gaps, spray expanding foam or stuff the opening with foam backer rods before applying caulk. If using steel wool, fill the gap with the material and then seal it with caulk or foam. Ensure the sealant completely covers the gap to create a solid barrier.
4.4. Allow to Dry and Inspect
Once the sealant is applied, allow it to dry according to the manufacturer’s instructions. After drying, inspect the areas to ensure that there are no gaps left. If needed, apply a second layer of sealant to fill any remaining voids.
5. Tips for Long-Term Success
To maintain the integrity of your seals and prevent future issues, here are some helpful tips:
5.1. Regular Inspections
Periodically check the areas around pipes and seals to ensure that they remain intact. Look for signs of wear, cracks, or damage that may require re-sealing.
5.2. Proper Ventilation
Ensure proper ventilation in areas where pipes and wires enter your home. This will help prevent moisture build-up, which can weaken the seals over time and promote mold growth.
5.3. Upgrade Insulation
If you notice drafts around your sealed areas, consider adding extra insulation to improve your home’s energy efficiency. This will help maintain a comfortable temperature while also protecting your home from pests.
6. Why Choose PestControlHub for Your Sealing Needs
If you're looking for the right materials or tools to seal entry points around piping, PestControlHub is your trusted source. We offer a wide selection of high-quality sealants, insulation products, and pest control solutions to keep your home secure. Visit our website to find the best products for your home maintenance needs and get expert advice on sealing techniques.

 Wildlife Resolutions4.0 (443 reviews)
 Pest Marshals of Toledo5.0 (2 reviews)
 LS Rodent Proofing & Pest Control Service5.0 (4 reviews)
 Best Termite & Pest Control4.0 (16 reviews)
 Varment Guard Wildlife Services5.0 (28 reviews)
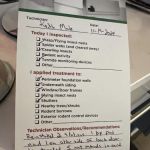 Pestban Inc4.0 (394 reviews)
 How to Use Monitors to Detect Pest Entry: A Comprehensive Guide
 How to Predict Which Pests Will Invade Next – Smart Pest Forecasting for the U.S.
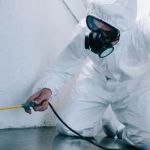 How to Conduct a Pest Risk Assessment at Home – Expert Guide
 How to Block Pest Entry Around Deck Joists: Effective Solutions
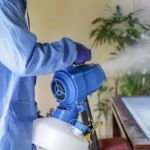 How to Safely Use Fumigation Methods: A Comprehensive Guide for Homeowners
 Why Pests Are More Active After Rain: Understanding the Link Between Weather and Pest Behavior