
How to Document Pest Activity Before Calling an Exterminator
On this page
Quick answer
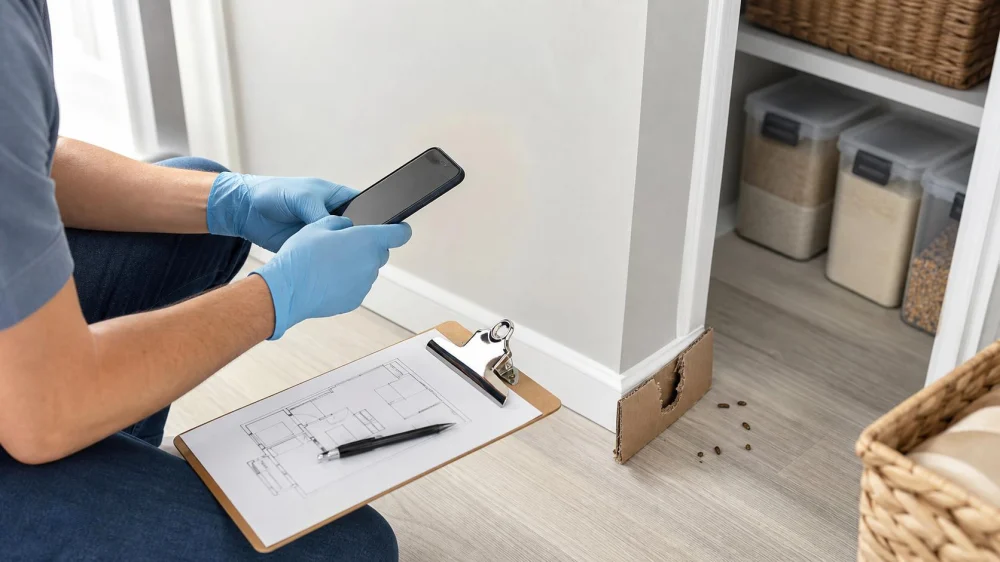
Before calling an exterminator, record where and when you saw pests or signs, take clear photos from a safe distance, note the number and direction of movement, and mark evidence on a simple floor plan. Preserve samples only if the company requests them and provides safe instructions. Do not spray, move nests, disturb droppings, or seal every opening before inspection; those actions can create exposure, scatter pests, or hide the evidence needed for correct identification.
Pest activity documentation is a dated record of sightings, damage, droppings, sounds, tracks, shed material, entry points, and environmental conditions that helps a pest professional identify the organism and locate the source.

PineRidge Pest & Critter Control
Mount VictoryHardin CountyOhio
125 N High St, Mt Victory, OH 43340, USA
Why documentation helps
Many pests are active at night, hide when people enter, or leave signs that resemble those of another species. A technician may arrive when nothing is visible. Good records show patterns: whether activity occurs near food, water, warmth, drains, rooflines, deliveries, pets, or a shared wall.
Documentation also creates a baseline for evaluating service. A few sightings after treatment do not mean the same thing as a continuing pattern in the original location. Dates and locations allow the company to compare activity over time.

Bb&D Termite Pest Control & Dryer Vent Cleaning Services Findlay, OH
13698 Township Rd 108, Findlay, OH 45840, USA
What to record safely
- Date and time: note when the sign first appeared and each later observation.
- Exact location: identify the room, wall, cabinet, appliance, pipe, window, exterior side, or floor level.
- Appearance: estimate size using a nearby common object in the photo, without placing your hand beside an unknown pest.
- Movement: record whether it flew, jumped, crawled, emerged from a gap, followed a trail, or disappeared into a void.
- Evidence: photograph damage, droppings, tracks, webbing, shed skins, egg cases, nesting material, or staining without handling it.
- Conditions: note leaks, condensation, recent construction, new furniture, deliveries, travel, weather changes, or nearby vegetation.
- Previous action: list traps, pesticides, cleaning, sealing, or contractor work already performed, including product labels when available.
Use the phone’s normal camera rather than an identification app as the final authority. Automated identification can be wrong, especially with a blurred image, immature insect, damaged specimen, or visually similar species.
A room-by-room inspection checklist
- Start at the sighting. Photograph the overall area before taking close views.
- Follow edges. Visually check baseboards, corners, door frames, pipe penetrations, cabinet joints, and floor-wall gaps.
- Look for resources. Without dismantling equipment, note accessible food, water, warmth, clutter, cardboard, pet food, or standing moisture.
- Check the matching exterior. From a safe ground-level position, note gaps, damaged screens, vegetation contact, standing water, or utility entry points.
- Map connected rooms. Mark bathrooms, kitchens, laundry areas, garages, attics, crawl spaces, and neighboring units only where you can inspect safely and lawfully.
- Stop at hazards. Do not enter a confined space, climb an unsafe ladder, open electrical equipment, disturb insulation, or move a large appliance.
A five-minute visual survey is more useful than an aggressive search that scatters pests or exposes the household to droppings, stings, bites, damaged wiring, or contaminated dust.
How to prepare for the service call
Tell the company the suspected pest, evidence locations, duration, property type, household members, pets, allergies or sensitivities relevant to service planning, and any pesticide already used. Ask whether it provides inspection, treatment, exclusion, monitoring, cleanup guidance, and follow-up.
Request the technician’s licensing or certification information as required by your state, a written scope, target pest, proposed products or methods, preparation instructions, reentry guidance, follow-up schedule, and price structure. For renters or multi-unit housing, notify the responsible property contact because activity may cross units and treatment authority may be limited.
What not to do before inspection
- Do not combine pesticides, use an unlabeled product, or apply more than the label permits.
- Do not use outdoor pesticide indoors unless the product label explicitly allows that site and use.
- Do not vacuum or sweep unknown rodent droppings before receiving appropriate cleanup guidance.
- Do not block an active wasp or hornet entry hole; trapped insects may move into the building.
- Do not seal every gap until the target and nest location are understood.
- Do not move infested furniture or boxes through clean rooms without professional advice.
- Do not rely on foggers as a universal solution; they can add exposure without reaching hidden harborages.
When to leave the area or seek urgent help
Leave and call emergency services for a serious allergic reaction, trouble breathing, loss of consciousness, a significant pesticide exposure, or an immediate fire or electrical hazard. Contact poison control in the United States at 1-800-222-1222 for suspected pesticide poisoning and follow emergency instructions.
Keep people and pets away from a large stinging-insect nest, aggressive animal, suspected venomous species, contaminated food area, or damaged wiring. Wildlife, bats, snakes, and protected species may require a licensed wildlife professional or local authority rather than routine insect control.
Sources and evidence notes
This checklist reflects integrated pest management practice: identify the pest, inspect for conditions and entry points, monitor activity, choose targeted controls, and evaluate results. Exact precautions depend on the species, building, pesticide label, state rules, and health risks. Product labels are legal directions for use in the United States; a licensed local professional can interpret site-specific evidence.
Frequently asked questions
Should I capture a pest for identification?
Only if the company requests a sample and it can be collected without bite, sting, contamination, or pesticide exposure. A clear photo is safer in many cases. Never handle bats, rodents, venomous animals, or unknown stinging insects.
Should I clean before the technician arrives?
Follow the company’s instructions. Normal sanitation can help, but removing all droppings, trails, damage, or specimens may erase diagnostic evidence. Photograph first and avoid hazardous cleanup.
How many sightings should I record?
Record every meaningful sighting until service, but do not remain in an unsafe area to gather more. Location and timing usually matter more than a perfect count.
Can I send photos for a quote?
Photos may support preliminary identification and pricing, but hidden damage, multiple pests, or structural entry points often require an on-site inspection. Ask what the quote includes and what could change.
What if I live in an apartment?
Document your unit, notify management according to the lease and local rules, and avoid moving pests to common areas. Effective control may require coordinated inspection of adjacent units or shared building systems.
Next steps
Create one folder for dated photos and a one-page sighting log. Mark the first location and connected rooms, list previous products or repairs, and call a qualified local company with those facts. Ask for identification and an inspection-based plan before choosing a broad treatment.



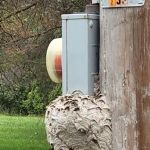 Bugs Bee Gone Pest Control4.0 (403 reviews)
 Lakeshore Pest Control4.0 (22 reviews)
 Green Pest Management CT LLC5.0 (23 reviews)
 Universal Pest5.0 (4 reviews)
 NEW YORK EXTERMINATING INC.4.0 (50 reviews)
 Mr. Pest Control4.0 (123 reviews)
 How to Seal Pest Entry Around Utility Penetrations
 How to Manage Pest Issues in Older Homes: Tips for Homeowners
 How to Use Non-Chemical Barriers for Pest Control: Natural Solutions for Your Home
 How to Remove Wasps Without Getting Stung: Safe and Effective Methods
 How to Use Barrier Treatments in Key Zones for Effective Pest Control
 How to Use Smart Technology for Rodent Control at Home